A Step by Step Guide to Skin preparation for makeup

Your wedding day or any major event requires makeup that not only looks beautiful and lasts long but also photographs well. Achieving a flawless bridal makeup look does not begin with foundation or highlighter; it starts with your skin. One key step is to ensure your skin preparation for makeup is done properly. This helps prevent your makeup from sinking or cracking during long ceremonies and ensures that in photos, your makeup looks smooth and natural rather than cakey. This article provides a complete skin preparation for makeup regimen to help you achieve a perfect, glowing base. Whether you are a bride, a bridesmaid, or preparing for a special date, these steps will help your makeup look its best. Why Skin Preparation Matters Before Makeup The skin should be clean and well-hydrated to make makeup apply more smoothly and last longer. Wedding days involve long hours, photographs, sunlight, and camera flashes, all of which require skin preparation which ensures that it is balanced, even, and properly prepared to prevent patchiness or breakouts. By preparing your skin in advance, you can avoid sudden reactions or sensitivity when wearing heavier makeup, ensuring that your appearance remains flawless and natural throughout the event. Skin Prep Before Makeup: What and When 3–6 Months Before Start a gentle but consistent skincare regimen that includes cleansing, moisturizing, sun protection, and maintaining a healthy lifestyle with good sleep, a nutritious diet, and proper hydration as part of skin preparation for makeup. If you have concerns such as stubborn pigmentation, acne scars, or uneven skin texture, consult a professional for facials, skin treatments, or other solutions prescribed by a dermatologist. Quick fixes are rarely effective; gradual, consistent treatment is the most reliable way to achieve long-term results. 2–3 Months Before Wash your face twice a day using a mild cleanser suitable for your skin type. Avoid harsh soaps or excessive amounts of cleanser. If needed, include a specific serum or treatment such as Vitamin C, Niacinamide, or Hyaluronic Acid, which can help achieve a brighter, more even, and well-hydrated complexion as part of skin preparation for makeup. Start gentle exfoliation—either a light chemical exfoliant (AHA/BHA) or a mild physical exfoliant—1–2 times a week to remove dead skin cells, soften the skin, and improve the absorption of other skincare products. Avoid over-exfoliating, as it can damage the skin. 1–2 Months Before Keep the skin hydrated and protected with SPF 40 daily to maintain a healthy, even-toned base, essential for skin preparation for makeup. If planning professional facials (brightening, hydrating, anti-pigmentation), start early to allow time to address any reactions or adjustments before the actual day. Drink plenty of water, consume antioxidant-rich foods (fruits, vegetables), and get adequate sleep — healthy skin reflects your diet and lifestyle. 1 Month to 1 Week Before Streamline your daily routine: Avoid using new or potent products, such as strong acids or retinoids, as they may cause irritation before the event. Focus on hydration and barrier maintenance: Use hydrating serums, sheet masks, calming creams, and rich moisturizers to keep your skin plump, smooth, and soft, completing your skin preparation for makeup. Test your makeup with your skin-prep products: This helps you see how your skin and makeup interact and make any necessary adjustments in advance. On Wedding Day Morning / Day Before Complete a mild wash and apply lightweight, water-based hydration to help fix makeup and prevent peeling. Use a good sunscreen if you have outdoor photographs to protect your skin and prevent darkening or patchiness. Keep lips and the eye area hydrated and supple with lip balm and eye cream or moisturizer to prepare these delicate areas for lipstick and eye makeup, as part of skin preparation for makeup. Advice for Brides Patch-test in advance: Do not try anything new at the last minute. Patch-test new products at least a week in advance to avoid breakouts or allergic reactions. Take care of exposed areas: Keep your body skin, neck, and hands moisturized and exfoliated. A radiant neckline and smooth arms make a huge difference under bridal attire. Eat well and stay healthy: A balanced diet, plenty of water, sufficient sleep, and managing stress all reflect on your skin. Healthy skin mirrors overall well-being, which is crucial for skin preparation. Plan treatments early: Schedule facials, peels, lasers, or microneedling at least 3–4 months before the wedding. This allows time for recovery and prevents last-minute skin issues. Conclusion The basis of any perfect bridal or special occasion makeup is healthy skin. You don’t need heavy filters or hours of makeup application to look radiant. Consistent, gentle, and effective skincare, combined with smart planning, ensures your skin preparation for makeup is complete and your skin is glowing naturally. Start early, stick to your routine, monitor your skin, and on the big day, your face will be a canvas ready for the makeup artist to work their magic. Source: 1
The Secret to Long-Lasting Bridal Makeup That Survives Every Emotion

Every bride dreams of long-lasting bridal makeup that stays perfect through tears, laughter, and every emotion. There is also a plethora of smiles, laughing, happy tears, and photos that day. Your make-up must remain bright and luminous throughout the ceremony till the very last dance. This is the reason why bridal makeup should last long. It is not merely a purchase of costly products but correct preparation, excellent methods and clever decisions. Here in this blog, we would divulge the actual secrets to makeup, which is beautiful throughout the day, natural, and resists every emotional situation. 1. Good Skin Care is the Real Starting Point: Makeup stays better on skin that is healthy, smooth, and hydrated. Most brides make the mistake of focusing only on makeup products and skipping skincare. The truth is that great makeup always starts with healthy skin. Here is what you can do: When you have calm and balanced skin, your makeup will look gorgeous and last longer. 2. Choose a Professional Makeup Artist Who Understands Your Skin: Every skin type is different. Those skins secrete oil, and others that dry readily. A talented artist will work with your type of skin and recommend what to wear that suits you best. When choosing an artist: When you are on trial, note the effect of the makeup on your skin after a few hours. This would provide a good idea about the performance of your bridal makeup. 3. Primer: A Secret of Long-lasting Bridal Makeup: Primer offers the permanency to your makeup. Imagine it as a canvas that is smooth, and your products are stuck on it. It manages the oil, minimises the emergence of pores, and prevents the melting of foundation. Choose: A good primer makes a big difference in durability. 4. Foundation That Matches Your Skin is the Key: Many brides choose a foundation that is too light or too heavy. This can make the face look patchy or cakey after a few hours. For long-lasting bridal makeup, the foundation must match your actual skin tone and undertone. What to check: 5. Waterproof Makeup is Your Best Friend: Wedding days come with emotional moments. Sobbing is hereditary, and therefore your make-up ought to be non-hydrous, particularly: The smudge-resistant formula makes sure that your eyes are perfect at all times. 6. Set the Makeup Properly: It is also as important to set the makeup as it is to apply it. A translucent setting powder locks your foundation in place. A good setting spray seals the entire look, making it sweat-proof and tear-proof. After applying makeup: This step will make sure that your makeup does not run away. 7. Select Lipstick That Stands the Test of Time Eating and Smiling: Bridal lips must remain beautiful at all smiling, talking and kissing. Long-term matte lip stains or lipsticks are good. You can also layer your lip colour to make it last. Pro tip: This technique keeps your lipstick intact. 8. Keep a Small Touch-Up Kit Handy: The finest makeup may be touched up after a few hours. Carry a small pouch with: Oil the blot rather than put in too much powder to make it caky. Final Thoughts Prolonged bridal makeup is not concerned with appearing heavy or excessive. It is not only to be happy, radiant and free on your special day. With good skin, a professional make-up artist and the right products, your appearance will remain fresh till the wedding day. Your wedding day is your day of glory. Believe in the process, treat your skin well, select your makeup rightly and be able to experience every emotion with confidence and beauty.
Step-by-step guide to a natural everyday makeup look for office

Introduction : An natural everyday makeup look for office beauty appearance must be able to improve upon your features, require minimal time, and persist during meetings and a hectic day. The purpose is new, smooth, and Cabinet-like – not oppressive or dramatic. To assemble a fast, wearable outfit we have a simple, step-by-step guide which includes five sections that are focused below. Prep: skin first : The most ideal canvas is wet and fresh skin. Apply a light moisturizer and SPF (unless your cleanser has these) first followed by a light cleanser followed by a light moisturizer. When you have oily areas, put a thin layer of a mattifying primer over the T-zone, and when your skin is dry, a hydrating one under the eyes where it is likely to be. This step is used to smooth texture and to make-up stick. Base: light, even coverage : Apply a light foundation, tinted moisturizer or BB/CC cream to get a natural coverage. Apply to the fingers or a damp sponge in a skin like finish. Conceal under the eyes and any spots with the little bit of concealer and mix. Prepare T-zone areas with a light powder that is not so vivid as to appear flat on the skin. Eyes & brows: soft definition : Draw in areas of the unsaturated brows using a pencil or powder in short hair-like strokes and brush it through with a spoolie. Using eyes, put a neutral matte shade close to the colour of your skin near the eyelid, put a shade that is slightly darker in the crease to provide some depth, and do not use heavy liners. Rather define the upper lash line with a brown/black pencil and apply one coat of mascara on the top lashes. Cheeks & contour: subtle warmth : Select a natural cream or powder blush either rose, peach or warm neutral. Smile with and towards the apples of the cheeks, and blend to the temple to give a lifted appearance. In case you need light definition, a matte bronzer under cheekbones and along the hairline, but not sculpted. Lips & finishing touches : Use a colored balm, glossy lipstick that is nude or a sheer lipstick to get a sleek but natural lip. Mist a setting spray or blot with tissue in order to take off excess shine and fix makeup. Have a mini concealer or lipstcik product to making a fast touch up throughout the day. Conclusion : This Natural everyday makeup look for office routine is approximately 10-15 minutes long and will make you appear fresh and professional. Pay attention to the skin preparation, light foundation, smoky eye makeup, a natural cheek blush, and an ordinary lip- the mix that will effortlessly seem to have been put together in 10 minutes, but will be comfortable throughout the day.
What Is the Difference Between Light and Full Makeup?
Introduction : Makeup is a significant factor to add beauty, improve confidence, and show personal style. Light and full makeup are the two most used styles, and each has its purpose and finish. Knowing the distinction between the two would enable you to pick the correct look in any given occasion. Coverage and Finish : The level of coverage is the first significant distinction between light and full makeup. Light makeup applies very few products to smooth out the skin tone in a natural, fresh appearance. It is concerned with demonstrating your actual skin with a slight retouch. Full makeup, on the other hand, involves heavy foundation, concealer, contour, and powder to achieve a natural, smooth and polished appearance free of blemishes. Product Usage : Light makeup uses less products- a light base, compact powder, blush, mascara and nude lipstick. This renders it simple and comfortable to wear day to day. Full makeup involves additional products and procedures like primer, foundation, contour, highlighter, eyeshadow, eyeliner, false lashes, and thick lipstick. This makes it dramatic and glamorous. Time and Effort : Time is another important contrast between light and full makeup. Light makeup is fast and easy and sometimes finished in 5-10 minutes. It is ideal in office, college, informal events or daily routine. Full makeup is more elaborate and can take 30-60 mins due to blending, layering and ensuring that every feature is perfected to fit weddings, parties, and photoshoots. Occasion and Style : Wearing light or full makeup is a decision depending on the occasion. Light makeup is ideal to a simple, classy and natural appearance that is appropriate in daytime affairs and workplaces. Special occasions are the most appropriate ones to apply full makeup as it provides a long-lasting glam, striking finish, and bold colours that can shine under lights and camera. Durability and Comfort : Full makeup takes longer to apply because of waterproofing sprays, setting sprays and several layers. It is formulated to remain intact in hours. Light makeup fades quicker, but is comfortable, breathable, and more natural. The option lies in your preference between long-weared out and lightness fresh. Conclusion : The distinction between light and full makeup is the coverage, products, time, and the overall outcome you wish to attain. Light makeup creates a subtle natural light, whereas full makeup provides an extreme, glamorous change. Both are aesthetically beautiful and it all depends on your personality, comfort and occasion to select the look that best suits you.
Makeup Tips for Hooded Eyes: A Complete Guide
Do you have hooded eyes? That means your eyelids fold a little over your eyes. Sometimes it makes your eyes look small, but that is okay! Hooded eyes are beautiful, and with the right makeup tips for hooded eyes, you can make them look bigger, brighter, and shiny. This guide will show you easy steps to make your eyes look happy and pretty. What are hooded eyes? Hooded eyes have a fold that covers part of the eyelid. When your eyes are open, you might not see the crease. Some people have a small fold, some have a bigger fold. Hooded eyes are special, and these makeup tips for hooded eyes can help your eyes look big, bright, and awake. You do not need to hide them; you just need the right steps. Step 1: Put on Eye Primer Eye primer is like magic cream. It helps your eyeshadow stay on and makes colors bright. Take a tiny dot on your finger. Rub it gently on your eyelid. Spread it to the top of your eyelid. Now your eyelid is smooth. Your colors will stay longer — an essential tip for hooded eyes. Step 2: Use Light Colors First Light colors make your eyes look bigger. Good colors are peach, cream, soft pink, soft gold, or light brown. Take a soft brush. Put the light color all over your eyelid. Blend it so it’s smooth. This is the first step; light color is the base. It helps other colors look nice and works well for hooded eyes. Step 3: Eyeliner Eyeliner is a line on your top lashes. It makes your eyes look bigger. Draw a thin line on your top lashes. Keep it thin near the inner corner. Make a small wing at the outside if you like. Hooded eyes look better with thin lines. Big lines can hide in the fold — a key makeup tip for hooded eyes. Step 4: Dark Colors Dark colors make your eyes look deep. For hooded eyes, put the dark colors above your fold, not in the fold. Good colors: Brown, dark pink, plum, gray. Use a small brush. Put the dark color above the fold. Blend it gently. Shadows above the fold make your eyes pop — a classic makeup tip for hooded eyes. Step 5: Highlight Under the Brow Highlight is a light color under your eyebrow; it makes your eyes look open. Take a small brush. Put light color under your eyebrow. Blend softly. This small step brightens hooded eyes naturally. Step 6: Mascara Mascara makes your lashes long and lifts your eyes. Wiggle the brush at the roots of the lashes. Pull the brush up to the tips. Apply top lashes first, followed by bottom lashes. Mascara gives your hooded eyes a big and happy appearance. Step 7: Eyebrows Eyebrows are like frames for your eyes. Nice eyebrows make your eyes look better. Fill in your eyebrows with pencil or powder. Keep the shape soft, not dark. Match the color to your hair. Soft eyebrows enhance hooded eyes beautifully. Step 8: False Lashes False lashes can make your eyes look bigger. Short lashes on the inside. Long lashes on the outside. Stick them close to your natural lashes. They are fun for parties; a great tip for hooded eyes. Step 9: Color Under Your Eyes A little color under the lower lashes makes your eyes soft and cute. Take a small brush. Put soft, dark color under your eye. Smudge it softly. Just a little is enough for hooded eyes. Step 10: Eyelid Tape Eyelid tape lifts your fold a little so your eyelid looks bigger. Cut a small piece of tape. Stick it on your eyelid fold. Press gently. Apply eyeshadow on top. Eyelid tape is a secret makeup tip for hooded eyes for a lifted look.
Beginners Eyeshadow Guide: How to Blend Like a Makeup Pro
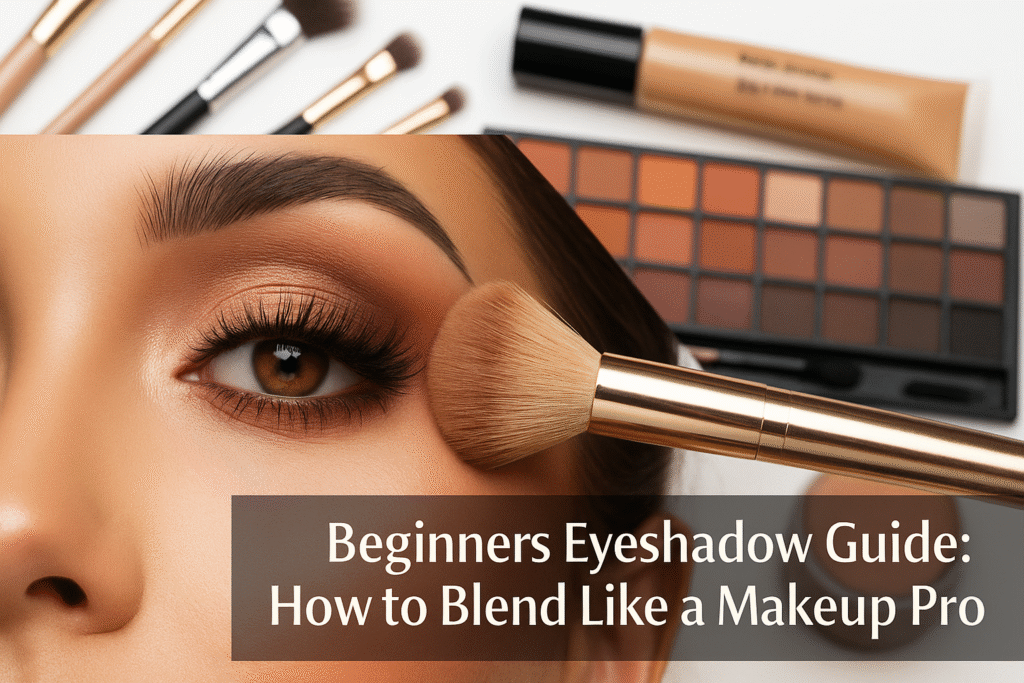
Introduction : The key to perfect, professional looking eye makeup is eyeshadow blending. The eyes may appear hard or uneven even when using the best palette of eyeshadows because of poor blending of eyeshadows. It will require some patience and practice to learn the proper tricks, but when you get them under your fingertips, your eye makeup will look smooth, soft, and gorgeous every time. This amateur guide will assist you to comprehend the fundamentals of blending beginners eyeshadow just like an expert. Start with a Smooth Base : You should always prepare your eyelids before putting on the beginners eyeshadow. Wipe your lids with any oil or makeup that is left behind and then apply an eyeshadow primer or concealer. This measure will make the colours look bright and will avoid creasing. Even a smooth base will be easy to blend since the product will slide smoothly on the surface. To get a glossy finish that allows the eyeshadows to blend perfectly, you could apply a neutral powder that would make the primer light. Choose the Right Brushes : It is equally important to use the correct tools as to use the products. The fluffy blending brush is needed to create smooth contours and a smaller precision one to outline the crease and outer corners. Do not apply more than one colour on the same brush without cleaning it first– the residual colour contaminates the colour applied. It is important to remember that even cheap eyeshadows can be made to appear professional with proper brush application. Understand Colour Placement : It is easier to mix colours as one knows where to put them. As a rule, the lightest colour is applied to the inner part of the eyes and the brow bone, the medium ones to the crease, and the darkest to the outer part of the eyes. Make they colours to meet by used in little circular movements. The intention is to remove the hard edges and the resulting gradient is created into a soft form, flowing seamlessly between shades. Layer and Build Gradually : A mistake that beginners make is to use too much eye shadow in a single application. Rather, begin with just a little bit and add intensity. Tap lightly with your brush and then apply them to remove any excess amount of pigment. Mix as you work adding additional colour where necessary. It is a layering technique that assists in producing a soft professional finish that is not patchy or falls out. Perfect the Final Touches : Once mixed stir, use a clean fluffy brush to make over the edges to remove any lines. By putting a sparkle of colour at the middle of the eye lid or highlight in the inner corner, the eyes will be brought out. Remember to smear your lower eyeliner in a little bit to make well-balanced. Lastly, use mascara or eyeliner to finish your make-up on your eyes. Conclusion : Beginners eyeshadow like a pro not about high quality products — it’s about to tell techniques and practice. With the right steps to provide, colour placement, and blending motions, they create eye looks to appear smooth and professional. Remember to be patients, start softly and blended till their shades will be perfect. Once you master these basics, you’ll have the confidence to experiment with bolder colours and creative looks that truly stand out.
Stay Glamorous Even in the Rain: Monsoon Makeup Tips

Monsoon weather means cool, green surroundings, and the pleasant music of rain. While it’s wonderful, the monsoon also poses special problems for the makeup world. Moisture, surprise showers, and excess sweat can make makeup smudge, disappear, or even slip off the skin. Keeping makeup intact throughout the monsoon needs the right cosmetics, techniques, and a mindset shift to embrace the natural dewy sheen that the monsoon provides. This guide on Monsoon Makeup Tips will help you stay glamorous even during rainy conditions while keeping your skin healthy and glowing. Waterproof Makeup Basics Waterproof makeup is designed to withstand water, sweat, and humidity. It ensures your appearance remains intact despite sudden weather changes. Products labeled waterproof include foundations, concealers, eyeliners, mascaras, eyeshadows, and lipsticks. These formulations are built to resist water and maintain their finish all day. Follow the monsoon makeup tips below 1. Prep Your Skin First Gently cleanse the face to remove grime and oil. Use a light, oil-free moisturizer to hydrate without excessive shine. Apply a mattifying primer to smooth the skin and control oil production. Good skincare ensures makeup lasts longer and doesn’t slide off due to humidity. 2. Opt for Light Foundations Tinted moisturizers or buildable liquid foundations with light coverage. Oil-free, matte-finish foundations to neutralize shine and minimize smudging. Waterproof bases to keep skin flawless even in rain. Less is more; a light base looks natural and feels comfortable in humid conditions. 3. Conceal Carefully Use waterproof concealers to resist sweat and moisture. Apply light layers for subtle coverage. Use concealer only where needed to avoid heavy buildup. Waterproof concealers keep skin looking even and smooth throughout the day. 4. Eyes That Last Apply an eyeshadow primer before shadow. Use neutral or waterproof eyeshadows; avoid cream shadows that crease. Choose waterproof eyeliners to maintain sharp lines. Opt for waterproof mascara to prevent smudging. Consider glitter eyeliners for a long-lasting glamorous effect. Well-prepped eyes keep makeup looking sleek even in rain or high humidity. 5. Long-Lasting Lips Use matte, long-wear lipsticks for a vibrant, lasting finish. Avoid glossy formulas that transfer easily. Carry a travel-sized lipstick for quick touch-ups. Waterproof lip products keep lips kiss-proof and complement your makeup. 6. Welcome a Dewy Glow Highlight cheekbones and brow bones for a natural radiance. Avoid heavy powdery finishes that may feel dry or cakey. Enhance natural features rather than masking them. The monsoon naturally adds a dewy glow; subtle enhancement creates a fresh, lively look. 7. Set Your Makeup Apply a translucent setting powder, especially on the T-zone. Use a setting spray for a natural finish. Avoid thick layers of powder that can appear heavy. Proper setting keeps makeup intact for hours without touch-ups. 8. Pack Blotting Papers Absorb excess oil and sweat without disturbing makeup. Focus on areas prone to shine, like forehead, nose, and chin. Keep a small pack in your bag for quick touch-ups. 9. Minimalist Approach Works Best Avoid heavy layers of products. Stick to essentials: light base, waterproof eyes, and long-lasting lips. Allow skin to breathe and prevent clogged pores. Less makeup lasts longer and feels lighter in humid conditions. 10. Skincare Matters Use non-comedogenic moisturizers and makeup. Cleanse thoroughly at night to remove dirt, sweat, and makeup residue. Exfoliate weekly to prevent clogged pores and breakouts. Healthy, glowing skin is the perfect base for flawless monsoon makeup. 11. Touch Up Your Makeup During the Day Carry essential items like loose powder, lipstick, and blotting papers. Apply sparingly to maintain a polished look. Avoid over-layering, which can make makeup feel heavy. Last Words Monsoon is not an excuse to compromise on beauty and ignoring Monsoon Makeup Tips. Waterproof products, proper techniques, and a minimalist approach allow you to stay glamorous even in humid weather. Preparation, accentuating the natural glow, and using long-lasting products are the keys to success. Confidence is your best accessory. Pair it with these monsoon makeup tips, and step out fearlessly even in heavy rain while remaining radiant, fresh, and fashionable.